How to Protect Your Home from Renovation Dust: A Room-by-Room Guide Before Work Starts
A renovation can be confined to one room, but its dust rarely is. Homeowners are often surprised to find a fine grey film on bedroom dressers, inside kitchen drawers and along stair rails, sometimes a full floor away from the work. Most of it is preventable. A few hours of preparation before the first wall comes down, plus a handful of daily habits during the job, will keep the dust where it belongs. This guide covers the dust barrier, each room in the house, and what to agree on with your contractor before work starts.
Quick answer
To protect your home from renovation dust, seal the work area with plastic sheeting or a zip wall and a zippered door, seal the HVAC registers in that area and upgrade or monitor the furnace filter, and cover the floors along the path from the entrance to the work zone. Pack away or bag anything in nearby rooms that is hard to clean, then agree with your contractor on daily containment habits such as keeping the barrier closed and HEPA vacuuming at the end of each day.
Key takeaways
- Contain dust at the source. A sealed barrier with a zippered door beats covering furniture in other rooms.
- In homes with forced air, the HVAC system is the main dust highway. Seal registers in the work zone and check the filter often.
- Test older homes for lead paint and asbestos before demolition or sanding.
- Protect the full route the crew walks, not just the room being renovated.
- Agree on dust control with your contractor in writing before work starts.
Why renovation dust travels so far
Sanding joint compound, cutting tile, breaking up plaster and drilling into concrete create very fine particles that stay airborne for a long time. They move wherever the air moves: under doors, into return-air vents, up stairwells and out on the shoes of everyone leaving the work area. That is why covering a couch in the next room is not enough. The goal is to stop dust from leaving the work zone, then protect what is closest to it.
Check older homes for lead and asbestos first
Before planning dust control, find out what the dust might contain. Health Canada advises that homes built before 1960 probably contain lead-based paint, and that homes built before 1990 may contain asbestos in materials such as insulation, plaster, ceiling and floor tiles, and drywall and spackling compounds. In the United States, renovation work in homes built before 1978 falls under the EPA’s lead-safe renovation rules for contractors.
If your home falls in either range, have suspect materials tested by a qualified professional before demolition, sanding or scraping. If lead or asbestos is found, that work belongs with qualified specialists following local regulations. Everything below assumes the materials have been checked.
Set up the main dust barrier
Zip walls and plastic sheeting
A zip wall is a temporary wall of heavy plastic sheeting held floor to ceiling by spring-loaded poles, with an adhesive zipper that creates a door. It seals off an open area, such as an open-concept kitchen, without damaging walls or ceilings. For doorways, a simpler setup works: tape plastic sheeting over the full frame and add a self-adhesive zipper down the middle. Contractors commonly use polyethylene sheeting in the 4 to 6 mil range because thinner plastic tears easily.
A few details make a big difference:
- Tape the sheeting with painter’s tape or tape rated for the surface, so it holds without pulling off paint.
- Overlap seams by at least a foot and tape them closed.
- For heavy demolition, add a second sheet a short distance away to create a simple airlock.
Ask about negative air pressure
On larger jobs, many contractors run a HEPA air scrubber or a fan that exhausts air out a window. This keeps the work zone under slight negative pressure, so air leaks into it rather than out of it. Ask whether it is part of the plan.
Seal the doors you are not using
Any door between the work zone and the rest of the house should be closed and sealed. Tape plastic over the frame on the work side, or at minimum add a door sweep or a rolled towel along the bottom gap.
Room-by-room protection plan
Kitchen
If the kitchen is next to the work area, empty open shelves and counters into lidded bins. Dust gets into cabinets through the gaps around doors, so tape the gaps of cabinets you will not need for a few weeks, and set up a small temporary kitchen elsewhere. Never cover an appliance’s vents or grilles while it is running, since many appliances need that airflow to stay cool.
Bathrooms
Keep any bathroom near the work area closed. Move toothbrushes, towels and toiletries into closed containers, keep the toilet lid down and the door shut. If the bathroom itself is being renovated, ask that open drains be capped so debris stays out of the plumbing.
Bedrooms
Bedrooms deserve the most attention because that is where you sleep. Keep bedroom doors closed for the full project with a door sweep or towel at the bottom, bag spare bedding and pillows, and use a plastic mattress bag in rooms close to the work. If you own a portable HEPA air purifier, run it in the bedroom of whoever is most sensitive to dust, such as a child or anyone with asthma.
Living areas
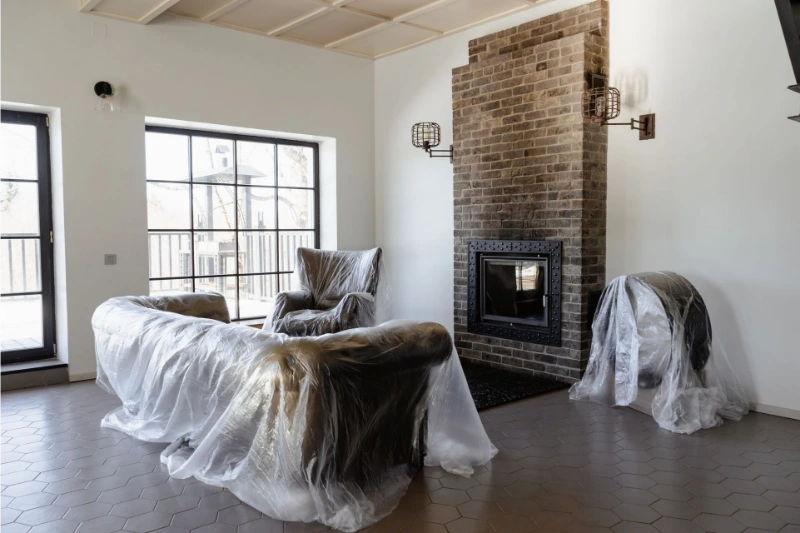
Pack books, photos and decor into lidded bins. Take down curtains and roll up area rugs, since fabric traps fine dust. Move larger furniture to the middle of the room and cover it with plastic sheeting taped at the bottom.
Electronics
Fine dust is hard on anything with a fan or vents. Move televisions, computers and gaming consoles away from the work zone if you can. Equipment that stays put can be loosely covered with plastic, but only while it is switched off and unplugged, because covered electronics can overheat.
If a smoke alarm in the work zone is covered to prevent false alarms during sanding or cutting, make sure it is uncovered at the end of every workday.
HVAC and vents
In homes with forced-air heating and cooling, ducts can carry dust from one room to every room.
- Seal the supply and return registers inside the work zone with plastic and painter’s tape, or with magnetic vent covers.
- Ask your contractor or an HVAC technician whether the system should be shut off during the dustiest phases, such as demolition and drywall sanding. In a Canadian winter, shutting off the heat for weeks is not realistic, so plan this with a professional.
- Upgrade to a pleated furnace filter with the highest MERV rating your system is designed to handle. A filter that is too restrictive can reduce airflow, so check the manufacturer’s guidance or ask a technician.
- Check the HVAC filter during renovation at least weekly and replace it when it looks grey. Never run the system without a filter.
Floors and stairs
Protect the entire route the crew will walk, from the entrance to the work zone. On hard floors, use heavy-duty temporary floor protection paper or board, taped at the seams with tape that is safe for the finish. Avoid plastic sheeting as a walking surface: it is slippery and can trap moisture against wood. On carpet, use adhesive carpet protection film. On stairs, secure every piece firmly, since a loose cover on a tread is a fall hazard. Place a walk-off mat or a sticky mat just outside the zip door so dust on shoes stays at the barrier.
Closets and storage
Closets near the work zone collect dust quietly, especially those with louvred doors. Put clothing in garment bags, move folded items into lidded plastic bins rather than open boxes, and tape the gaps around closet doors you will not open for a while.
What to agree on with your contractor before day one
Before work starts, ask:
- Who sets up the dust barrier, where will it go, and who checks it each day?
- Will the crew use HEPA vacuums and tools with dust extraction, and will tile or stone be wet-cut or cut outside?
- Will an air scrubber or exhaust fan keep the work zone under negative pressure?
- Which entrance and route will the crew use, and how will that path be protected?
- How will the site be cleaned at the end of each day, and what does final cleanup include?
- Who will check and change the furnace filter during the project?
Put the answers in writing so everyone has the same expectations.
Daily containment habits during the work
Build these habits into every workday:
- Keep the zipper door closed whenever no one is passing through.
- Clean the work zone with a HEPA vacuum at the end of each day. Dry sweeping lifts fine dust back into the air.
- Bag debris inside the work zone before carrying it through the house.
- Use shoe covers inside the zone and refresh the sticky mat daily.
- Walk the barrier each morning and re-tape anything that has peeled or torn.
- If you enter the work zone during dusty tasks, wear a properly fitted respirator rated for fine particles, not a basic dust mask.
Renovation dust checklist
Use this quick checklist before work starts:
- Lead and asbestos testing done for older homes
- Dust barrier or zip wall with a zippered door installed
- HVAC registers in the work zone sealed
- Upgraded furnace filter installed and a weekly check scheduled
- Floors protected along the full crew route, including stairs
- Bedrooms closed, bedding bagged, mattresses covered
- Open shelves, decor, curtains and rugs packed away
- Electronics moved or unplugged and covered
- Closets bagged, binned and taped
- Dust control expectations agreed with the contractor in writing
After the work: a short note on cleanup
Leave the barrier up until the last sanding and cutting is done, and let the dust settle before the final clean. Replace the furnace filter, remove register covers and floor protection carefully, and clean each room from the top down.
Even with good containment, fine dust settles in easy-to-miss places such as vents, baseboards and window tracks. A room-by-room deep cleaning checklist is a useful way to work through those areas in order once the work is finished.
Frequently asked questions
How do I keep renovation dust out of the rest of my house?
Seal the work area with a dust barrier or zip wall, seal the HVAC registers inside it, protect the crew’s route and keep the barrier closed. Daily HEPA vacuuming stops most of the remaining spread.
Should I turn off my HVAC system during a renovation?
It often helps during the dustiest phases, but whether it is practical depends on the season and your system. At minimum, seal the registers in the work zone, and ask an HVAC technician before shutting the system off.
What is a zip wall, and do I need one?
A zip wall is a temporary floor-to-ceiling plastic wall held up by spring-loaded poles, with a zipper door. You need one when the work area has no door you can seal, such as an open-concept kitchen or a partial basement renovation.
What HVAC filter should I use during a renovation?
Use a pleated filter with the highest MERV rating your system is designed for, and check it at least weekly, since construction dust clogs filters quickly.
How long should dust barriers stay up?
Keep them up until all sanding, cutting and demolition is finished. Taking them down before the final drywall sanding undoes most of the work.
About the Contributor: Joe Duodu is the owner of Pro City Maids, an insured residential and commercial cleaning company that has served homes and businesses across Toronto and the GTA since 2016. His team cleans homes every day, including many just after a renovation, so he writes from what actually keeps dust under control in real homes.