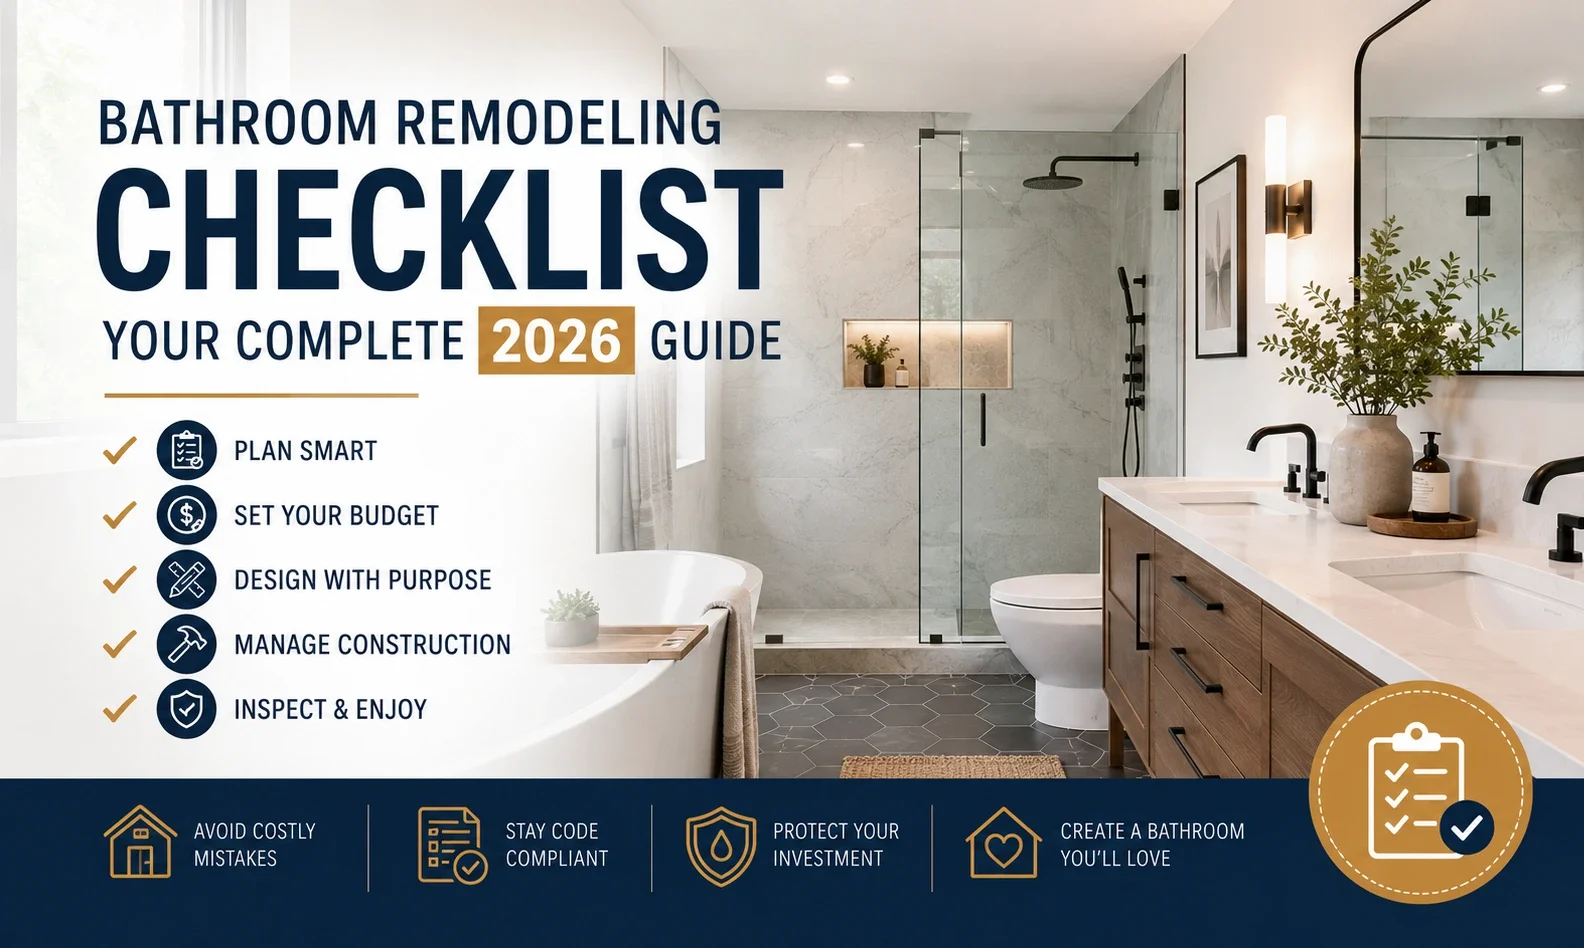
Bathroom Remodeling Checklist: Your Complete 2026 Guide
A bathroom remodel can improve comfort, storage, safety, and daily convenience. However, it also combines plumbing, electrical work, ventilation, waterproofing, cabinetry, flooring, and finishing work inside one small room.
That complexity makes missed decisions expensive. A vanity may block a door. A shower enclosure may not fit. Tile may arrive late. Worse, an attractive bathroom can hide poor waterproofing or unsafe electrical work.
This bathroom remodeling checklist helps you organize every phase before demolition begins. It covers your budget, project scope, contractor, materials, permits, work sequence, inspections, final testing, and post-project monitoring.
Use it for a cosmetic update, partial renovation, full gut remodel, accessible bathroom, or primary suite transformation. However, local building rules differ across the United States. Always confirm permit, plumbing, electrical, and inspection requirements with your local building department.
Quick Bathroom Remodeling Checklist
A successful bathroom remodel usually follows six phases: defining the project, setting the budget, completing the design, preparing the home, managing construction, and inspecting the finished room. Each phase should be completed before the next major commitment, especially before ordering custom products or closing walls.
| Phase | Essential tasks |
| Planning | Define goals, inspect the room, measure and set priorities |
| Budgeting | Compare estimates, include permits and create a reserve |
| Design | Finalize layout, lighting, storage, fixtures and finishes |
| Preconstruction | Confirm permits, contracts, orders and temporary arrangements |
| Construction | Complete demolition, rough-ins, waterproofing and installation |
| Completion | Test systems, finish the punch list and collect warranties |
1. Define Why You Are Remodeling
Begin by identifying the problems the new bathroom must solve. Your goals will control the project scope, budget, layout, materials, and contractor requirements. A bathroom designed for children needs different features than a guest bath, rental property, primary suite, or aging-in-place renovation.
Walk through the existing bathroom and write down every problem.
Look for:
- Leaking faucets or supply connections
- A slow or frequently blocked drain
- Loose flooring
- Soft areas near the toilet or tub
- Cracked grout
- Failed caulk
- Peeling paint
- Persistent odors
- Condensation
- Weak ventilation
- Poor lighting
- Limited storage
- Unsafe electrical outlets
- A difficult shower or bathtub entry
- Doors or drawers that collide
- Fixtures that feel cramped
Separate the list into three categories.
Must Fix
These are safety, water, structural, electrical, ventilation, or functional problems. They should receive funding before decorative upgrades.
Should Improve
These changes improve usability but are not urgent. Examples include adding storage, improving lighting, installing a double vanity, or changing the shower configuration.
Nice to Have
These are optional upgrades. Examples include heated flooring, premium tile, a smart mirror, custom cabinetry, body sprays, or a towel warmer.
This system protects the budget when quotes come in higher than expected.
2. Choose the Correct Project Scope
A bathroom remodel can range from a simple update to a complete structural renovation. Decide which level describes your project before requesting estimates. Contractors cannot provide comparable proposals when each contractor is pricing a different scope.
| Project level | Typical work | Main risk |
| Cosmetic update | Paint, hardware, mirror, lighting and accessories | Spending too much on short-term trends |
| Fixture update | Vanity, faucet, toilet, lighting or flooring | Discovering incompatible plumbing |
| Partial remodel | Shower, tub, vanity or flooring replacement | Hidden damage around the work area |
| Full remodel | Most fixtures and finishes are replaced | Coordination between multiple trades |
| Gut renovation | Walls open and systems are replaced | Structural, plumbing and code surprises |
| Layout change | Plumbing, walls or entries move | Higher labor, permits and complexity |
Keeping major plumbing fixtures near their existing locations often reduces construction complexity. Moving the toilet, shower, or tub may require drain changes, vent modifications, floor repairs, and additional inspections.
A layout change can still be worthwhile when it solves a major problem. However, it should provide a clear improvement in movement, safety, privacy, storage, or accessibility.
3. Inspect the Existing Bathroom Before Designing
An early inspection can reveal conditions that affect the project before you purchase materials. Check visible surfaces, plumbing access points, ventilation, flooring, walls, and the area below the bathroom when possible.
Pay attention to:
- Water stains beneath the bathroom
- Staining around supply valves
- A moving or rocking toilet
- Loose tile
- Soft flooring
- Cracks near doors or windows
- Rusted plumbing
- Slow drainage
- Mold-like growth
- A fan that does not vent outdoors
- Outdated wiring
- Inadequate outlet placement
Excess moisture can contribute to mold, damaged finishes, and structural deterioration. The Environmental Protection Agency emphasizes that moisture control and proper ventilation are central to preventing mold problems. Review the EPA’s remodeling moisture guidance before opening walls. (US EPA)
Do not treat a musty smell as a cosmetic problem. Find and correct the moisture source before installing new materials.
4. Check for Lead Paint and Asbestos Risks
Older bathrooms may contain materials that require special handling. The age of the home, previous renovations, and original building materials should influence your demolition plan.
Renovation work in a pre-1978 home can disturb lead-based paint and create hazardous dust. The EPA recommends testing suspect surfaces and using lead-safe practices. Contractors covered by the Renovation, Repair and Painting Rule must meet lead-safe certification requirements. Review the EPA lead-safe renovation guidance. (US EPA)
Older homes may also contain asbestos in flooring, adhesives, insulation, textured coatings, or other building products. Do not sand, cut, drill, or remove a suspicious material without appropriate evaluation. The EPA asbestos information center explains how homeowners can find qualified professionals. (US EPA)
Add these items to the pre-demolition checklist:
- Confirm the construction year
- Review previous renovation records
- Identify suspicious flooring or wall materials
- Arrange testing when needed
- Include remediation in the budget
- Define who will handle hazardous waste
- Protect children, pets, and occupied rooms
5. Build a Complete Bathroom Remodel Budget
Your budget should cover the entire project, not only visible fixtures. Include design, labor, permits, demolition, disposal, building systems, waterproofing, delivery, repairs, and final finishing.
National averages can be misleading because labor rates, permit costs, room conditions, and material choices vary greatly. Local written estimates are more useful than a single national price.
Use four budget groups.
Required Construction
This includes demolition, framing, subfloor repairs, plumbing, electrical work, ventilation, waterproofing, wall preparation, inspections, and debris removal.
Fixtures and Finishes
This includes the shower, tub, toilet, vanity, faucets, lighting, tile, flooring, mirror, hardware, paint, glass, and accessories.
Project Administration
This includes permits, design services, engineering, temporary storage, delivery charges, cleaning, and building or association fees.
Contingency Reserve
Keep part of the budget separate for concealed damage, old plumbing, unsuitable wiring, framing problems, or material substitutions.
The following is a planning example, not a national pricing standard:
| Budget category | Sample planning share |
| Labor and building systems | 40% |
| Fixtures and finishes | 35% |
| Waterproofing and surfaces | 10% |
| Permits, delivery and disposal | 5% |
| Contingency reserve | 10% |
Adjust these percentages after receiving detailed local estimates.
Costs Homeowners Commonly Forget
- Permit fees
- Design drawings
- Demolition labor
- Dumpster or hauling costs
- Floor protection
- Mold or lead testing
- Subfloor repair
- Plumbing valve replacement
- Additional electrical circuits
- Exhaust duct improvements
- Wall blocking
- Waterproofing materials
- Tile overage
- Delivery fees
- Return shipping
- Temporary storage
- Professional cleaning
- Touch-up work
Never spend the full available budget on products before demolition.
6. Confirm Permit and Inspection Requirements
Bathroom permits depend on the location and scope. Cosmetic work may not need a permit, while plumbing relocation, new circuits, structural changes, and major ventilation work often require approval.
Contact the city, county, or other authority having jurisdiction. Ask:
- Does this project require a building permit?
- Are separate plumbing or electrical permits needed?
- Can a homeowner apply, or must a licensed contractor apply?
- Which inspections are required?
- Must walls remain open for inspection?
- Are plan drawings required?
- Are there local water-efficiency rules?
- Are contractor licenses required?
- How long does approval normally take?
- What records should remain with the property?
For a condominium or planned community, also check:
- Homeowners association rules
- Building management approval
- Work-hour restrictions
- Elevator reservations
- Insurance requirements
- Water shutoff procedures
- Debris removal rules
- Neighbor notification requirements
Place approved permits and inspection records in the project folder.
7. Decide What to DIY and What to Hire Out
DIY work can reduce labor costs, but the risk depends on the task. A mistake involving paint is usually repairable. A mistake involving a concealed drain, electrical circuit, shower pan, or structural wall may cause serious damage.
| Task | DIY suitability | Main consideration |
| Painting | Often suitable | Proper bathroom paint and surface preparation |
| Hardware installation | Often suitable | Accurate alignment |
| Accessory installation | Often suitable | Avoid hidden wiring and pipes |
| Simple demolition | Possible with caution | Lead, asbestos, plumbing and electrical hazards |
| Vanity replacement | Intermediate | Supply, drain and wall attachment |
| Toilet replacement | Intermediate | Flange condition and leak testing |
| Tile installation | Advanced | Flat surfaces, layout and movement joints |
| Shower waterproofing | Professional skill recommended | Hidden failure can cause major damage |
| New wiring | Licensed professional often required | Shock, fire and code risk |
| Plumbing relocation | Licensed professional often required | Drainage, venting and inspection requirements |
| Structural changes | Professional assessment | Load paths and framing safety |
A hybrid approach works for many homeowners. A professional can handle regulated or high-risk work, while the homeowner completes painting, accessories, cleanup, or simple finishing tasks.
8. Hire and Compare Bathroom Contractors
Compare contractors by scope, qualifications, communication, and documentation. Do not choose solely by the final price.
The Federal Trade Commission recommends obtaining multiple written estimates and ensuring the contract identifies the work, materials, price, dates, and contractor information. Review the FTC home improvement contractor guidance before signing. (Consumer Advice)
Ask each contractor:
- Are you licensed where required?
- Can you provide proof of insurance?
- Who will supervise the project?
- Who performs plumbing and electrical work?
- Who obtains the permits?
- Which inspections are included?
- What waterproofing system will you use?
- How will you protect occupied rooms?
- How will debris leave the property?
- What products are excluded?
- How are change orders approved?
- What happens when hidden damage appears?
- What is the estimated work sequence?
- What payment is due at each milestone?
- What workmanship warranty is included?
Compare Scope, Not Only Price
Create a comparison sheet with one row for each major item.
| Scope item | Contractor A | Contractor B | Contractor C |
| Demolition | |||
| Disposal | |||
| Permits | |||
| Plumbing | |||
| Electrical | |||
| Ventilation | |||
| Waterproofing | |||
| Tile labor | |||
| Painting | |||
| Fixtures | |||
| Cleanup | |||
| Warranty |
A low quote may exclude work included in a higher quote.
9. Measure the Bathroom and Record Existing Conditions
Accurate measurements prevent ordering errors and layout conflicts. Measure the room more than once, and confirm measurements again before ordering custom glass, cabinetry, countertops, or doors.
Record:
- Wall-to-wall dimensions
- Ceiling height
- Door width and swing
- Window location and size
- Toilet centerline
- Drain locations
- Supply valve positions
- Vent locations
- Outlet and switch locations
- Lighting positions
- Shower or tub dimensions
- Vanity dimensions
- Floor level changes
- Wall thickness
- Baseboard and trim sizes
Photograph every wall. Include a tape measure in important photographs to show scale.
Also record model numbers for any fixture that will remain.
10. Finalize the Layout Before Selecting Finishes
The layout should support movement, privacy, storage, cleaning, and daily routines. Check every door, drawer, cabinet, glass panel, and fixture clearance.
Ask:
- Can the entry door open fully?
- Can vanity drawers open without hitting another fixture?
- Is there enough standing space at the sink?
- Can the shower door open safely?
- Can towels be reached from the shower?
- Is toilet paper accessible?
- Can the toilet be cleaned easily?
- Is storage available near the point of use?
- Will the mirror and lighting align?
- Can plumbing connections be serviced later?
- Can two users share the room when needed?
Use painter’s tape to mark fixtures on the floor and walls. Walk through normal activities before approving the design.
11. Plan Accessibility and Long-Term Safety
A remodel is an opportunity to reduce fall risks and prepare for future needs. Safety features do not need to make the room look institutional.
The National Institute on Aging recommends grab bars near toilets and inside and outside tubs or showers. It also recommends nonslip surfaces in areas that may become wet. Review its room-by-room fall prevention guidance. (National Institute on Aging)
Consider:
- Slip-conscious flooring
- A low-threshold or curbless shower
- Wall blocking for future grab bars
- Properly installed grab bars
- A handheld showerhead
- A shower bench
- Lever-style handles
- Improved nighttime lighting
- Clear movement paths
- Contrasting edges
- Easy-to-reach storage
- A wider doorway where practical
The federal ADA Standards mainly apply to covered public, commercial, and government facilities. A typical private home is not automatically required to follow commercial ADA bathroom standards. However, the dimensions and principles may provide useful planning references. (ADA.gov)
12. Create a Complete Fixture and Material Schedule
A material schedule lists every selected product, model number, size, finish, supplier, price, delivery date, and installation requirement.
Include:
Plumbing Fixtures
- Toilet
- Tub
- Shower base
- Shower valve
- Showerhead
- Hand shower
- Body sprays
- Bathroom faucet
- Sink
- Drain assemblies
- Supply lines
- Shutoff valves
Cabinets and Storage
- Vanity
- Countertop
- Medicine cabinet
- Linen cabinet
- Shelves
- Drawer organizers
- Wall niches
Surfaces
- Floor tile
- Shower floor tile
- Wall tile
- Grout
- Caulk
- Waterproofing membrane
- Backer board
- Drywall
- Primer
- Paint
- Trim
Electrical and Ventilation
- Exhaust fan
- Duct components
- Vanity lights
- Ceiling lights
- Shower-rated light
- Switches
- Timers
- Humidity controls
- GFCI outlets
- Heated floor controls
Finishing Items
- Mirror
- Shower enclosure
- Towel bars
- Hooks
- Toilet paper holder
- Robe hooks
- Window covering
- Door hardware
- Accessories
Do not rely only on product photographs. Confirm dimensions, installation instructions, electrical requirements, rough-in dimensions, and replacement-part availability.
13. Choose Water-Efficient Fixtures
Water-efficient fixtures can reduce water use without sacrificing performance when selected carefully. Look for WaterSense-labeled toilets, bathroom faucets, and showerheads.
The EPA states that a full or partial bathroom update with WaterSense fixtures can produce meaningful household water savings. Review the EPA’s better bathroom guidance when comparing fixtures. (US EPA)
Before purchasing, check:
- Flow rate
- Flush performance
- Water pressure requirements
- Valve compatibility
- Replacement cartridges
- Available repair parts
- Product warranty
- Local rebate programs
- User reviews about real performance
Do not select a fixture only because it uses less water. It must also perform reliably.
14. Plan Waterproofing as a Complete System
Tile, grout, and caulk are visible finishes. They are not the entire waterproofing system. The waterproof assembly behind the finish must direct water toward the drain while protecting walls, framing, and the subfloor.
Your contractor should explain:
- The chosen waterproofing system
- The approved substrate
- Shower pan construction
- Drain compatibility
- Corner and seam treatment
- Fastener treatment
- Niche waterproofing
- Curb waterproofing
- Required cure times
- Flood testing requirements
- Manufacturer installation instructions
Request photographs before tile covers the waterproofing.
Do not combine random products from different systems unless their manufacturers approve the assembly. Each layer must work with the next layer.
Waterproofing Hold Point
💡 Pro-Tip: The “X-Ray” Record Before your contractor closes the walls with drywall or backer board, take high-resolution photos and videos of every wall. Capture the exact location of all plumbing pipes, electrical wires, and structural blocking.
Save these in your project folder. Years from now, if you need to hang a heavy shelf, mount a mirror, or troubleshoot a leak, these photos will act as your “x-ray vision,” saving you from accidentally drilling into a water line or cutting an electrical wire.
Before tile begins:
- Verify the correct membrane
- Check all seams and corners
- Inspect penetrations
- Confirm the shower slope
- Check the drain connection
- Complete required testing
- Photograph the entire assembly
- Obtain inspection approval when required
This is one of the most important quality checkpoints in the remodel.
15. Upgrade Bathroom Ventilation
Ventilation removes moisture and protects paint, grout, cabinets, walls, and indoor air quality. A decorative bathroom can still fail when steam remains trapped after every shower.
The U.S. Department of Energy recommends bathroom exhaust fans with at least 50 cubic feet per minute and states that fans should vent outdoors. Local codes and larger bathrooms may require different sizing, so confirm the final specification with the contractor and building department. (The Department of Energy’s Energy.gov)
Check:
- Fan airflow capacity
- Room size
- Duct length
- Duct diameter
- Number of turns
- Exterior termination
- Noise level
- Timer control
- Humidity sensor
- Backdraft damper
- Insulation around ducts in cold areas
Never allow the fan to discharge into an attic, ceiling cavity, or crawlspace.
16. Plan Electrical Safety and Lighting
Bathrooms combine electricity and water, so electrical planning must prioritize safety. Existing outlets and circuits may need upgrading when adding heated flooring, smart toilets, towel warmers, high-powered lighting, or other equipment.
The U.S. Consumer Product Safety Commission explains that GFCI protection can reduce the risk of severe electrical shock in wet locations. Review the CPSC GFCI safety information. (U.S. Consumer Product Safety Commission)
Your electrical checklist should include:
- GFCI-protected outlets
- Correct circuit capacity
- Approved lighting near wet areas
- Exhaust fan wiring
- Heated-floor controls
- Mirror power requirements
- Night lighting
- Accessible switches
- Proper fixture ratings
- Inspection before walls close
Use layered lighting:
- General ceiling lighting
- Task lighting around the mirror
- Wet-area lighting where appropriate
- Low-level nighttime lighting
- Optional decorative lighting
Place vanity lights to reduce facial shadows rather than creating glare directly above the user.
17. Order Materials Before Demolition
Demolition should not begin simply because the design is finished. Confirm that essential products are ordered, available, and correct.
Long-lead or size-sensitive products may include:
- Custom vanity
- Countertop
- Bathtub
- Shower base
- Specialty tile
- Shower valve
- Glass enclosure
- Medicine cabinet
- Custom mirror
- Lighting
- Imported fixtures
- Replacement windows
Before demolition:
- Confirm supplier stock
- Review delivery dates
- Inspect delivered products
- Check quantities
- Check finish colors
- Confirm model numbers
- Open boxes carefully
- Photograph damage
- Keep return packaging
- Store products securely
- Protect fragile materials from moisture
Do not install a damaged product to keep the schedule moving.
18. Prepare the Home and Temporary Bathroom Plan
Construction affects more than the bathroom. Dust, noise, water shutoffs, deliveries, debris, and worker access can disrupt the household.
Complete these tasks:
- Empty the bathroom
- Remove valuables
- Set up another bathroom
- Move daily toiletries
- Protect nearby flooring
- Cover furniture
- Seal air vents when appropriate
- Establish the worker entry path
- Identify material storage
- Identify debris storage
- Protect children and pets
- Notify neighbors when appropriate
- Confirm work hours
- Locate the main water shutoff
- Document existing damage outside the work area
For a one-bathroom home, create a detailed temporary plan. You may need temporary accommodation during parts of the project.
19. Follow the Correct Bathroom Remodeling Sequence
The exact order may vary, but major work should follow a logical sequence. Work hidden behind walls must be completed, tested, and inspected before surfaces close.
Typical Bathroom Remodel Order
- Confirm permits and approved plans
- Protect the home
- Shut off utilities safely
- Complete controlled demolition
- Inspect framing and subfloor
- Repair hidden damage
- Complete framing changes
- Install wall blocking
- Complete plumbing rough-in
- Complete electrical rough-in
- Complete ventilation rough-in
- Complete required inspections
- Install insulation and approved wall materials
- Install waterproofing
- Test the shower assembly
- Install tile and flooring
- Install and finish walls
- Install vanity and countertop
- Install plumbing fixtures
- Install lighting and electrical devices
- Install shower glass
- Install hardware and accessories
- Complete final caulk and paint
- Test all systems
- Finish the punch list
- Complete final inspections
- Collect warranties and records
Avoid installing finished cabinets or fixtures while heavy demolition or dusty work continues.
20. Use Inspection Hold Points
A hold point is a stage when work pauses for review before it becomes hidden or difficult to change.
Hold Point 1: After Demolition
Check:
- Framing
- Subfloor
- Plumbing
- Signs of leaks
- Mold or moisture
- Pest damage
- Unexpected wiring
- Structural conditions
Hold Point 2: After Rough-Ins
Check:
- Drain positions
- Water lines
- Valve heights
- Outlet positions
- Lighting boxes
- Fan duct
- Blocking
- Fixture clearances
Hold Point 3: After Waterproofing
Check:
- Membrane coverage
- Seams
- Corners
- Fasteners
- Curb
- Niche
- Drain
- Required testing
Hold Point 4: Before Final Payment
Check every finish and system. Do not rely on appearance alone.
21. Complete a Detailed Final Walkthrough
The final walkthrough should test function, safety, finish quality, drainage, ventilation, and installation stability.
Plumbing Tests
- Run each faucet
- Test hot and cold water
- Inspect supply connections
- Fill and drain the sink
- Flush the toilet several times
- Check the toilet base
- Run the shower
- Test diverters
- Test the handheld shower
- Check tub drainage
- Check under the vanity
- Look below the bathroom for leaks
Drainage Tests
- Confirm the shower drains quickly
- Look for standing water
- Check floor slope
- Verify water remains inside the wet area
- Test the shower door seals
- Inspect transitions and corners
Electrical Tests
- Test all lights
- Test every switch
- Test outlets
- Test GFCI protection
- Test heated floors
- Test timers
- Test humidity controls
- Test mirrors and accessories
Ventilation Tests
- Run the fan
- Check airflow
- Confirm exterior discharge
- Listen for rattling
- Test the timer or sensor
- Verify the damper opens
Finish Inspection
- Check tile alignment
- Check grout joints
- Check caulk
- Look for chipped tile
- Inspect paint
- Check cabinet doors
- Check drawers
- Check countertop seams
- Check mirror alignment
- Check fixture stability
- Check glass operation
- Check hardware placement
- Inspect all trim
Documentation
Collect:
- Permit approvals
- Inspection records
- Product manuals
- Product warranties
- Workmanship warranty
- Paint colors
- Grout information
- Tile details
- Extra materials
- Contractor contact information
- Final invoices
- Change orders
- Waterproofing photographs
Create a written punch list with photographs and completion dates.
22. Avoid These Bathroom Remodeling Mistakes
The most expensive mistakes usually begin before construction.
Starting Without a Final Scope
Unclear projects create inconsistent quotes, rushed decisions, and change orders.
Choosing Finishes Before the Layout
Products should fit the plan. The plan should not be forced around products already purchased.
Measuring Only Once
Doors, toilets, vanities, tubs, and shower glass require accurate dimensions.
Moving Plumbing Without a Functional Reason
Relocation may increase cost and complexity without improving daily use.
Ignoring Ventilation
A weak or incorrectly vented fan can damage new finishes.
Treating Tile as Waterproofing
The concealed waterproof assembly provides the main protection.
Ordering Products Too Late
Missing products can stop multiple trades.
Hiring Only by Price
A low price may exclude permits, disposal, waterproofing, preparation, or finishing work.
Using Verbal Change Orders
Every change should include the price, schedule effect, and approval in writing.
Closing Walls Before Inspection
Plumbing, wiring, blocking, and ductwork should be checked while visible.
Paying in Full Before Completion
Tie payments to clear milestones and retain appropriate leverage until the punch list is finished.
Forgetting Warranties
Record product and labor warranty terms before the project closes.
23. Check the Bathroom Again After 30 Days
Some issues appear only after repeated use. Schedule another inspection after the bathroom has been used normally.
Check:
- Caulk separation
- Grout cracking
- Cabinet swelling
- Slow drainage
- Toilet movement
- Loose hardware
- Door alignment
- Water beneath the vanity
- Ceiling condensation
- Fan performance
- Glass leaks
- Heated-floor controls
- Paint bubbling
- Unusual odors
- Changes in water pressure
Report warranty concerns in writing and include dated photographs.
Final Takeaway
A bathroom remodel succeeds when hidden construction receives the same attention as visible design. Start with the room’s problems, define the project scope, create a complete budget, confirm permits, compare detailed contractor proposals, and order critical materials before demolition.
During construction, inspect framing, plumbing, wiring, ventilation, and waterproofing before they disappear behind finished surfaces. Finally, test every fixture and keep complete project records.
Home Renova Hub provides practical guidance to help homeowners make informed renovation decisions. Explore the related planning guides before approving your layout, materials, or contractor scope.