How to Plan Motorised Blinds Before Plastering
Key Takeaways
Planning motorised blinds early can help avoid expensive changes after plastering. Focus on the decisions that affect power, access, controls and coordination with other renovation work.
- Plan before plastering: Identify windows that may need motorisation before walls and ceilings are closed.
- Coordinate the power: Give the electrician accurate product and motor-location information before rough-in.
- Protect future access: Make sure motors, connections and service areas can be reached for maintenance.
- Check for trade clashes: Compare window treatments with electrical layouts, cabinetry, doors, lighting and ceiling details.
- Keep controls practical: Position switches and controls where they remain convenient after furniture and cabinetry are installed.
- Document concealed work: Photograph and label relevant wiring, framing and connection points before plasterboard goes up.
- Delay finishes, not coordination: Fabrics and colours can be finalised later, but decisions that affect construction should be addressed early.
Renovation decisions are often made in a predictable order: walls, electrical work, plastering, painting, cabinetry and then furnishings. Window coverings tend to arrive near the end of that list. That timing is reasonable for fabrics and final colours, but it can be too late for one important decision: whether any blinds or other window furnishings may eventually be motorised.
Motorisation does not need to be selected on day one. Homeowners do, however, benefit from preserving sensible power, access and control options before wall linings and finishes close everything in. A small amount of early coordination can prevent visible cable routes, inaccessible connection points and clashes with handles, cabinetry or curtain tracks later.
Start With the Window, Not the Motor
Before discussing wiring or controls, record how each opening actually works. Note whether the sash slides, winds or swings; where the handles sit; how far doors open; and whether furniture, joinery or appliances will occupy the nearby wall.
Next, identify what the room needs from its window furnishings. A bedroom may prioritise privacy and light reduction. A living area may need glare control at one time of day while retaining a view at another. A high or difficult-to-reach opening may make convenient operation more important than it would be at a standard window.
This room-by-room review helps separate genuine motorisation candidates from windows that may work perfectly well with a manual solution. It also gives the electrician, builder and window-furnishing specialist a shared plan instead of leaving each trade to make assumptions.
Decide What Must Remain Accessible
Motorised window furnishings still need physical access for inspection, adjustment and future servicing. Pelmets, bulkheads and recessed pockets should not permanently conceal components that may need attention.
Ask three practical questions before details are finalised:
1. Can the blind, track or headbox be removed without damaging the ceiling or wall finish?
2. Can a technician reach the power or connection point safely?
3. Will future curtains, blinds, handles and opening panels clear one another throughout their full movement?
A beautifully concealed detail is not successful if routine access requires cutting plaster. Where a recessed treatment is planned, drawings should show both the finished appearance and the maintenance path.
Coordinate Power Before the Walls Close
The correct electrical approach depends on the selected system, the building and applicable requirements. Homeowners should not attempt electrical work themselves. A licensed electrician should determine cable routes, connection methods, isolation requirements and compliance.
From a planning perspective, the useful step is to identify likely motor locations and provide the electrician with accurate product information before rough-in. Avoid choosing a generic power position based only on the centre of the window. Motors, tracks and control components may sit at a particular end or require a specific clearance.
If the final product has not yet been chosen, document the uncertainty rather than guessing. It may be possible to preserve an accessible route or suitable provision until the specification is confirmed. The key is that any provisional approach is agreed by the relevant professionals and remains accessible.
Keep Controls Easy to Use
Motorisation should make a room easier to operate, not create a new set of frustrations. Think about who will use the space and how the window covering will be controlled in everyday life.
Wall controls should not be hidden behind an open door, tall cabinet or future bedhead. Handheld controls need a sensible storage location. App or smart-home control may be useful, but it should not be the only practical way to operate a frequently used window covering unless that arrangement genuinely suits the household.
For groups of windows, decide whether they should move together, independently or in smaller zones. A single room may have different needs on different elevations. Grouping everything without considering sun direction and privacy can reduce the flexibility that motorisation was intended to provide.
Check the Other Trades’ Drawings
Many conflicts happen because each element looks correct on its own drawing. Compare the window-furnishing plan with reflected ceiling plans, electrical layouts, cabinetry drawings and door schedules.
Look specifically for:
- downlights or air-conditioning outlets competing with curtain tracks or pelmets
- cabinetry extending into the operating or service zone
- power points placed where the finished treatment cannot conceal or reach them
- door leaves, window handles or security screens crossing the planned blind path
- decorative cornices or ceiling details reducing mounting space; and
- full-height curtains conflicting with floor vents or built-in furniture.
Resolving these intersections on paper is generally simpler than discovering them after painting and installation.
Photograph and Label the Rough-In
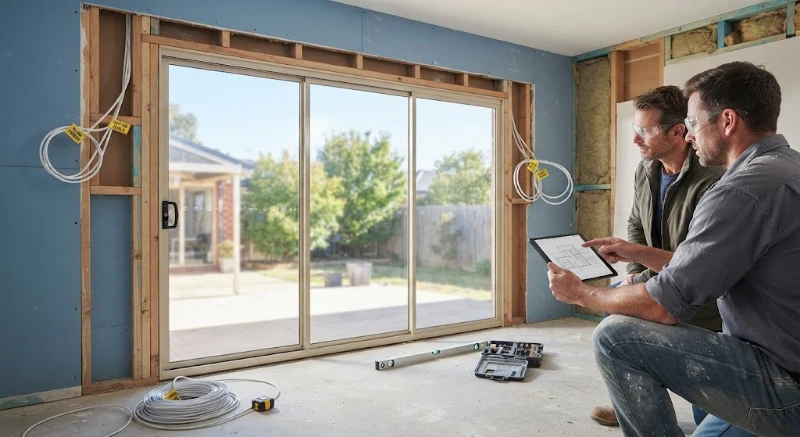
Before insulation and plasterboard conceal the framing and services, take clear photographs of each relevant opening. Include wider room views and close-ups, then label the window, orientation and date.
Keep the approved electrical information, product notes and marked-up plans with the renovation records. These are useful for the installer and can also help years later if servicing or changes are required. Photographs are not a substitute for compliant plans or professional testing, but they provide valuable context once the wall is closed.
Delay Colour, Not Coordination
Homeowners do not need to settle every fabric colour or control preference before plastering. They do need to protect the decisions that become expensive or disruptive to change later.
A sensible sequence is:
1. identify the windows that may benefit from motorisation;
2. confirm how the openings, furniture and cabinetry will operate;
3. discuss likely mounting, motor and access requirements with a window-furnishing specialist;
4. have a licensed electrician design and complete the required electrical work;
5. record the concealed work before wall linings are installed; and
6. finalise products, fabrics and control settings once dimensions and finishes are confirmed.
This approach keeps options open without pretending that every specification is known at the start.
A Better Finished Result Begins Earlier
Motorised blinds and other automated window furnishings are most successful when they are treated as part of the renovation plan rather than an accessory added after completion. Early coordination protects clean finishes, practical access and reliable everyday use.
For homeowners planning window furnishings in Newcastle, Lake Macquarie or the Central Coast, Pamido Blinds provides information about motorised window-furnishing options that can be coordinated with the builder and licensed electrician before installation.
Editorial note: This article provides general planning information only. Electrical design and work must be completed by appropriately licensed professionals in accordance with the project requirements.
Frequently Asked Questions
1. Do motorised blinds need to be planned before plastering?
Yes. The blinds themselves do not necessarily need to be selected before plastering, but it is useful to plan potential motor locations, power requirements, mounting space and access beforehand. Early coordination can help prevent difficult or expensive changes after the walls and ceilings are finished.
2. Do motorised blinds need electrical wiring?
It depends on the motorised blind system. Some systems may use fixed electrical connections, while others may use rechargeable batteries or other power arrangements. A licensed electrician and the window-furnishing specialist can determine the appropriate setup for the specific product and renovation.
3. Where should power points for motorised blinds be located?
There is no single location that works for every blind. The position can depend on the motor, headbox, track design and window configuration. The electrician should use the manufacturer’s requirements and the final or provisional product specifications rather than simply placing a power point in the centre of the window.
4. Can motorised blinds be installed after plastering?
Yes, motorised blinds can often be installed after plastering and painting. However, if the system requires concealed wiring, recessed mounting or dedicated electrical connections, completing the necessary preparation before the walls are closed can produce a cleaner result and reduce the need for later building work.
5. What should I photograph before plasterboard is installed?
Take clear photographs showing relevant wiring, connection points, framing and other concealed services around the window. Include both wide room views and close-ups, and label each photo with the window location and date. Keep these records with the renovation plans for future installation, maintenance or servicing.